
Today, I would like to share with you this quick and easy tutorial that I made using "DecoArt" acrylic Paints....

Here it is almost... finished

For a while I have being "collecting" these cute wood shapes that seemed to be in trend nowadays all over the craft stores ...

and I decided to make some name tags out of them and label my rolling Craft/paint Tote...

do you want to make some for you?
here we go with the tutorial....
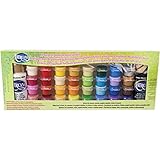
grab some of your favorite paints some wood shapes
and make your own tags!
BTW: I have included A PDF for you to print as well...see below ...
Tutorial : how to paint a wood name tag
Step 1:
- glue 2 pieces of wood back to back (to make the tag sturdier)
- place some tape on top (blue tape: to avoid crackings on the wood), grill over the tape a hole
- sand the bird and the hole with sand paper and metal file
- paint with DecoArt paint
- trace pattern with white pencil (drawing included in PDF for birds)
NOTE: you can adapt this idea to any shape in wood...

Step 2:
- paint the tag following instructions from the PDF

Step 3:
- trace name with white pencil
- finish painting (see instruction on PDF)

Close up of the head and name

Close up of the tail

I decided later to add some glitter...
Simply add glue (with any glue pen) and sprinkle some silver glitter ...let it dry and varnish!
Close up of the silver glitter

Finished tag (without the glitter)

here it is in my rolling tote hanging from a white chain

Back side
The glitter makes it sparkle...It is real cute!
And do not forget to use "Thriple Thick Brilliant Gloss Glaze" from DecoArt (supplies below)
this adds lots and lots of Glaze, and shine!

I would love to see your versions!!!
ENJOY!!!
Visit as well my Post on :


SUPPLIES


This is so beautiful Bibiana. I love the blue colors, and you really did an awesome job on this one here, and it´s just perfect for your trolley, so everyone will know, who´s it is, when you´re out.
ReplyDeleteHow´s your hands doing? A lot better I hope, so you can soon get back to do what you love in a full scale. I hope you´ll have a wonderful Easter comming up here with your lovely family soon
Superbe Bibiana, merci pour le partage. Bises.
ReplyDeleteOn voit que tu as eu beaucoup de plaisir à faire tes petits oiseaux, bravo !
ReplyDeletetout mignon ce porte nom étiquette !
ReplyDeleteC'est superbe bibiana ! Très réussi ! Et c'est une très bonne idée de déco de sac ! Bises
ReplyDeleteYour little bird is so sweet and great idea for a tag on your bag!
ReplyDeletevraiment tres joli ça sent bon le printemps ces couleurs, bravo, bisous
ReplyDeleteThis is really pretty! Thanks for the instructions!
ReplyDeletelove your bird. it would be perfect as a keychain too!
ReplyDeletemarta
superbe oiseaux, tres delicat bravo
ReplyDeletebisous
Stunning creation Bibiana and so versatile too, love the little birdie lol!
ReplyDeleteLove & Hugs
Jacquie J xxx
http://jewelscardcraft.blogspot.co.uk/
Super sympa! Bises
ReplyDeleteQ lindo tutorial Bibiana, me encanto para colgarlo en la mochila de mi niña!!! Gracias por compartir.
ReplyDelete