hover over

HOVER OVER ANY PHOTO AND SHARE IT ONTO YOUR
PINTEREST, FACEBOOK OR TWITTER ACCOUNTS


Showing posts with label canvas. Show all posts

Thursday, March 5, 2015

"Floating" Canvas...

Hello MY Dear Crafty Friends:

Here we go with a quite long post with lots of photos...

A "Floating" canvas 
embellished with "Petaloo" Flowers 
and painted with "DecoArt" Americana Acrylic paints, 
Metallic Lustre creams 
and Americana stencils!!

front floating canvas using petaloo and decoart products

SUPPLIES

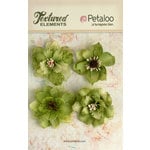
Assortment of "Petaloo" flowers...to make the flower arrangement

supplies floating canvas using petaloo and decoart products

An Americana Decor (12x12) stencil, used to make the words with the Metallic Lustre creams

supplies floating canvas using petaloo and decoart products

"DecoArt" Acrylics (paint bottles), Metallic Lustre creams (round containers) and Americana stencil

supplies floating canvas using petaloo and decoart products

Background painted with acrylics

After painting the background with big strokes of acrylic paints in greens, purples, blues and some splashes of white...and letting it dry ...

background floating canvas using petaloo and decoart products

I added the words "Marché Aux Fleurs" 
(flower market) with the stencil and the creams..top right

step 1;
place stencil in desire position
secure stencil on canvas with tape, cover the other words (with white papers)

step 2;
sponge the cream with a make up sponge over the letters "Marché" with Gold/champagne metallic Lustre
remove stencil,

step 3;
clean with a baby wipe that word.
repeat process with the second word "Aux" with blue/turquoise cream
clean with baby wipe
repeat process with the third and last word "Fleurs",
remove stencil,
clean it

step 4;
outline the words with a black "Copic" pen
steps stencil floating canvas using petaloo and decoart products

see the shine of the creams
that I added here and there on the canvas too...

trick: I colored the silver rhinestones with "Copic" marker in blue!

 stencil floating canvas using petaloo and decoart products

paint the large word "Paris" with acrylics

photo on the left;
place stencil, secure it
dab with a stencil brush (picking on the side of the photo) the word "Paris" with pansy color,
let it dry
then dab only the sides with purple to give a 2 tone effect..

TIP: always when picking up paint with your brush, dab it on a paper towel before placing color on the project, to take excess paint and avoid running paint underneath the stencil...

photo on the right;
remove stencil and voilà! the 2 tone effect!

 stencil acrylic  floating canvas using petaloo and decoart products

Note: at this point WASH the stencil, the baby wipes are a quick method. but when done I recommend to wash the stencil with mild soap and water
(SEE POST how to clean your stencils HERE)

This is a 12"x 12" canvas placed on a 19"x22" white frame (intended to be used for an "advent calendar") But I used it here to create my "Floating" canvas...

Photo taken on a black background (the floor of my garage!)

 stencil acrylic  floating canvas using petaloo and decoart products


then embellish it with flowers, pearls, leaves and yute ribbon from "Petaloo"

canvas floating canvas using petaloo and decoart products

close up of the arrangement
flowers detail floating canvas using petaloo and decoart products
a last view on a white wall background

side view floating canvas using petaloo and decoart products


I hope you push yourself 
by using more often your paints

I did not use any difficult technique...
just give some strokes right, left up and down!!! 
and embellish the whole piece with these gorgeous flowers!

maybe try on a smaller piece
 if it feels too intimidating...


Thanks for the visit

SUPPLIES


Tuesday, May 13, 2014

Mix Media Canvas with Stencils

Hello MY dear Stamper Friends:

Today I am bringing to you a small mix media canvas  that I created using the Stencil "Umbel" from Memory Box among other stencils, continuing with the blog blitz that MB is hosting these 2 weeks on stencils...


I embellished  the corner with some dies, a "mulberry paper" flower, some silver yarn and lace


I folded the "Lunette Butterfly" die and I placed it on top of the flower that was stenciled with "Golden-Iridescent pearl" acrylic ink


Here are the step by step on how I made this canvas...

1- paint with a brush the canvas with acrylics :"silks/acrylics" from "Luminarte".
These acrylics are different from regular acrylic paints  in that they are translucent, glazed, so when mixing they do not cover the other color but they mix and let the 1st color show through...wonderful stuff!!!


2- stencil with this flower stencil  with "Silks'Acrylics" with a make up sponge in purple and blue some areas of the canvas


3- stencil some more designs (bubbles) with a sponge in "Golden" acrylic fluid in turquoise color.
 "Golden" is the "regular" brand of acrylics that I use...


4- with some "Viva Inka Gold" metallic rubs I added more designs (the mesh in gold)


5-with "Archival ink" pad in black and a sponge, stencil the "umbel" flower, masking the designs not wanted on the canvas...repeat several times...


NOTE:
clean right away you stencil!
"Archival ink" will stain your stencil...
I clean it immediately with "Stazon" cleaner and then added some "odorless turpentine" used for cleaning the brushes that you used with oil paints...


6- Last step:
 Stencil the flowers with "Golden-Iridescent pearl" acrylic paint and then add some "Washi tape" and embellish it as desired...


Look at the shine from the metallic rubs and  the acrylic "Golden iridescent pearl" paints!
The "Silks/acrylics" on the background are really translucent...I love these little paint jars!!!


Last view...


Thank you once more for your constant support!
 I hope I brought you another fun idea on how to use your stencils...

Tomorrow I will have a fun VIDEO 
using this same stencil 
with a NEW technique, stay tuned!!!

SUPPLIES 


Follow on Bloglovin