hover over

HOVER OVER ANY PHOTO AND SHARE IT ONTO YOUR
PINTEREST, FACEBOOK OR TWITTER ACCOUNTS


Showing posts with label new release. Show all posts

Tuesday, July 14, 2015

NEW Memory Box dies for Halloween

PLAY with me at my 
post and OLD project and WIN a surprise gift 
or see side bar! 

_____________ 0 _____________

Hello My friends:

The NEW Memory Box release for the Holidays 2015 is already here!

I am sharing with you two Halloween cards made with all the NEW dies...

two memory box dies halloween cards

the first one is a Halloween Scene...

cave scene with memory box dies halloween card

This card was posted at  the French Blog for Memory Box: "Un brin de créativité"...


The second one is a Halloween card with some crows...

crows scene with memory box dies halloween card

 this card was posted today at the Spanish blog: "A crear se dijo!"

If you would like to win one of these dies visit the language blogs during the blog blitz, 
from Monday, july 13th until Friday, July 17th 

and leave  me THERE a comment..
the following week 
I will announce the winners at the language blogs.... 

two halloweeen scenes with memory box dies


Thanks for the visit, have a wonderful day...

see you here and there 
for more NEW projects all through the week
and for the possibility to take home a NEW DIE!

Follow on Bloglovin


SUPPLIES


Tuesday, April 28, 2015

Stenciled Card Made with a NEW Memory Box Stencil

Hello MY dear stamper Friends:

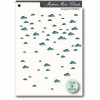
I got this awesome stencil from Memory Box...
the "Orchard Branch" 
and look this beautiful cherry tree branch 
that I got in this card...

stenciled cherry branch card

You need to be aware that this stencil is divided in 3 sections...knowing this the stencil is very easy to use, and it gives you this different possibilities in the shading for the flowers and leaves...

stencil cherry branch

- start by sponging the 1st area with brown ink: this is the branch.
- then lift the stencil, and place the second section over the sponged area. 
Place the center of the  flowers over the sponged dots (see arrows) these are your points of reference.
Here I sponged carefully (masking some areas) the flowers with light pink and then sponged with link green the leaves...make sure to cover the areas that you do not want ink on.
-when done, lift  again stencil and place the 3rd and last section over your design, following the "guide" of the dots. add darker pink on flowers and dark green ink over the leaves...

I added some extra leaves here and there...

here it is a close up

stenciled cherry branch detail


 I loved using this stencil, It gives you an instant gratification, you do not need to be an expert in coloring, the stencil and the different sections make the work for you...
I added a corner die from the NEW spring collection and voilà!

stenciled cherry branch front card
 
This card was featured at the French Blog:"Un brin de créativité" for Memory Box.

Thanks for the visit, 
I am very behind in visiting all your blogs 
but little by little, I am catching up...

see you tomorrow for another craft project 
this time, 
I will be using some 
NEW "Poppystamps" products!


SUPPLIES

Sunday, April 26, 2015

Tutorial How to Chalkboard using Wood Stamps

Hello My Dear Stamper Friends:

Here it is the Tutorial that I promised you Last week;

how  to make a
"Chalkboard" card 
using various sentiments 
in wood mount rubber stamps


chalkboard sentiments using Memory Box stamps

These stamps are from the NEW Spring release from Memory Box: love the sayings, the fonts with that extra bold word  and the little extra stamp that comes on the side of each main saying.

Step 1:
- Choose your stamps (my design uses 6 different sentiments)
- Choose the base where they will be stamped (square postage die)
- First, stamp them on a draft paper to see the placement
(on the right you can see my first attempt, It did not worked ... the second one was the final design)

chalkboard card using Memory Box wood mount stamps

Step 2:
- Using the "stamp-a-magij" (stamp positioner) start stamping each sentiment  according your design with "Versamark" ink and then heat emboss with white embossing powder.
Each sentiment at at time.

How to use the Stamp positioner or "stamp-a-majig": 
- place the corner "arm/elbow"against the corner of the acetate/plastic sheet
- stamp on top of the clear acetate: making sure to place the wood mount stamp against the "arm/elbow" (see photo)
- LEAVING in place the "arm/elbow" in position, lift stamp
- remove acetate/plastic sheet (LEAVING in place the "arm/elbow" in position)
- stamp the sentiment, onto the paper making sure to positioned the wood mount stamp AGAINST the corner of the "arm/elbow"
- lift stamp, lift "arm/elbow"
*clean acetate sheet each time that you will use a new sentiment


chalkboard card using Memory Box wood mount stamps step 1


Step 3:
-place the sentiment stamped on the clear acetate sheet whenever you want in your project (that is why this sheet is clear)
-place "arm/elbow" against the sheet
- LEAVE in place the "arm/elbow" in position, lift the acetate sheet

chalkboard card using Memory Box wood mount stamps step 2


Step 4:
- stamp the sentiment with "Versamark" ink, onto the paper making sure to positioned the wood mount stamp AGAINST the corner of the "arm/elbow"

chalkboard card using Memory Box wood mount stamps step 3

Step 5:
- lift stamp, lift "arm/elbow"
-pour white embossing powder, heat emboss
- repeat process for the next sentiment

*clean acetate sheet each time that you will use a new sentiment


chalkboard card using Memory Box wood mount stamps step 4

Step 6:
when all the 6 sentences are stamped and heat embossed
- stamp with white ink the small images (on the side of the stamp: roses, doves, stars etc) in the blank spaces to fill the open areas
-sponged with a dauber some areas LIGHTLY with white ink

chalkboard card using Memory Box wood mount stamps step 5

And here it is the finished card with all the sentiments display in the front of the NEW postage stamp die (front square panel).

Last  step:
-Doodle with a white gel pen or a white "Prismacolor" color pencil extra lines, dots, swirls etc
-Finally, embellished the card as desired.
I placed a NEW rose flower die on the right, added a second panel with the NEW stitched pinky border Die, and finalized it with some ribbon!

This card was featured at the Spanish blog: "A crear se dijo!" for the Spanish speaking fans of Memory Box!

NOTE: this technique will be very easy to use with clear/ photopolymer stamps...
but I wanted to use the wood mount and explained the "stamp positioner", since we ALL (I am sure), have so many sentiments in wood...


chalkboard card using Memory Box wood mount side view


I hope this tutorial on "how to chalkboard"
entice you to try this fun and pretty technique 
using the sayings that you already have in wood mount
 or try these NEW wonderful sentiments from MB...
 
 Thanks for the visit and the comments.
_________________ 0 ____________________

Current challenge # 8:
want to revive an old project on your blog? and bring it to the present and win a prize?
then this challenge is for you,
participate here   

_________________ 0 ____________________
 
SUPPLIES