hover over

HOVER OVER ANY PHOTO AND SHARE IT ONTO YOUR
PINTEREST, FACEBOOK OR TWITTER ACCOUNTS


Showing posts with label Twisted Easel Card. Show all posts

Saturday, September 5, 2015

How to Easel Cards and A Halloween Twisted Easel Card with Petaloo

Hello My dear friends:

**First the project...**

A Halloween Twisted Easel card...
fun shape to display the gorgeous "Petaloo" Flowers paired with some die cuts....

halloween twisted easel card front with petaloo flowers

I die cut the "midnight witches brew" frame into a patterned paper, secure it to the rectangular front panel and embellished with black cotton paper flowers and "Kraft" burlap flowers and butterflies  from "Petaloo"

halloween twisted easel card supplies with petaloo flowers

NOTE:
On the folded card, the front panel was cut into a square shape from where the front rectangular panel will be adhered.
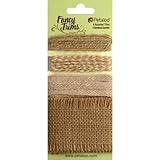
I made some loops with the burlap cord/trim...and overlap the flowers...

halloween twisted easel card  with petaloo flowers

loops..

halloween twisted easel card detail flowers with petaloo flowers

details of the flowers...

halloween twisted easel card  with petaloo flowers

Side view of the twisted easel card

halloween twisted easel card side with petaloo flowers

Front panel...

halloween twisted easel card front panel with petaloo flowers
Base...

halloween twisted easel card base panel with petaloo flowers


**Now onto the tutorial...**
_____________ o _____________
101 on how to make ANY EASEL CARD

Easel card cards are very easy to make...once you master the main folds....
General rule:
1- from a  folded card, (any shape: rectangular, square, circle, octagon etc...)
2- Fold in half the front panel of the card (to make a support: the easel) 
3- into which a separate front panel (of the same shaped used for the base) will be affix...

To make ANY "shaped" folded card ...
Fold you paper and place underneath a "desired shaped " die onto the cutting machine.
Cut below the top of the die to make hinge...see photo

how to make easel cards cut

The folded card is cut....

how to make easel cards cut below die

Below  are some samples of a heart, a pinking edge circle, an octagon shaped folded cards, cut following the same process as above...

Fold in half the font panel
Note: if you desired a "twisted" easel, make that fold in a diagonal direction

how to make easel cards samples

affix a separate single shape to this "easel"...of the same shape as you main card....

how to make easel cards samples

view from the side

how to make easel cards samples side  views

samples of several shaped easel cards....

how to make easel cards samples

when folded flat...

how to make easel cards samples  flat


In today's case, I wanted a "rectangular" front and base card...
 (usually these type of cards are square)....

For this,  The base/front panel NEEDS to be cut in a "square"
then folded diagonally to place the rectangular front panel in a diagonal way and make a rectangular "Twisted Easel Card"....

Note: You can make a "square" folded base and attach the rectangular panel to this square...
you will have then a 'square' base with a rectangular front panel...
in my case I wanted BOTH base and front panels to be "rectangular"

folded to send flat

halloween twisted easel card flat card

A last View...

halloween twisted easel card last view


Ok, my Friends thanks for the visit 
See you soon for some other craft projects...


SUPPLIES


Friday, May 2, 2014

Happy Birthday cards for Lavinia's Challenge # 5

Hello my dear crafty and stamper friends:

Lavinia stamps host a challenge at their blog  every month
The NEW date for the challenge is from now on  every 2nd of the month  
and this  month's theme is "Birthday Girl"...
And here it are my contribution...for this month...

My 1st card is a monochromatic (in blues) Twisted Easel card and the little fairy "Nissa" is holding a fun bouquet of balloons made out of buttons...


The front panel has "Nissa" embossed in turquoise Embossing powder and I highlighted all the contour with a white gel pen to make her stand out and then outline it with a turquoise fine point pen. The background was made with 2 stencils from Memory Box ( stars and flowers) using some distress inks


And she is bringing some gifts; which are simple little rectangles embellished with bakers twine and the Lavinia stamp of "wild poppies" were embossed with 3  different  colors of embossing powders...


A last view,
Card closed ready to be tucked away in an envelope to be send for the "birthday girl"


I made a video on a twisted easel card for a men HERE,  in case you want to have a pick on the construction of this type of cards...
 

The 2nd card holds a small gift,
it is a bookmark card holder...


Curious to know  how I made this background?

Well this is very fun technique using  alcohol inks and blowing some "air" into the surface to achieve a splash effect...


Place some drops of alcohol inks on glossy paper + some blending solution to dilute the color and "blow" the inks with that bottle/spray...which is used to remove dust from keyboards on computers...
and this is the effect...


as for the construction of the card? 
simply cut diagonally the top portion and the front panel fold it towards the left, to make the pocket, easy!!!


here is the bookmark, I place some magnet adhesive sheet "found at Michaels too" on the inside to hold on to the pages of the book


with the book, (maybe this  will be the other gift, besides the bookmark)...
the reverse has  a different stamp! this cute couple of fairies..."Star Gazing"


A last view of the pair...


I hope you can play along with us!

For a little bit more of inspiration do not forget to visit my fellow DTM, they always have gorgeous projects...their blogs are found at the main Lavina Stamp Challenge Blog,  or on the side bar of my blog, and remember to leave us some comments and enter your project there for the chance to win a voucher of £40 at the Lavinia web shop site, e-mail entries are accepted too, so you do NOT  need to have a blog to participate! and remember to use Lavinia stamps on your project for a birthday celebration !

GOOD LUCK!


SUPPLIES


Lavinia Stamps: fairies:  Nissa; Star gazing; Melodie silhouette small;
Foliagewild poppies; Fushia; willow;