
Maybe this is not the right time to give you a tutorial...
I know you ALL must be so busy...with the Holidays....
BUT....I have done these cards using this technique
so I decided to publish it anyways...

let's go right away to the tutorial:
How to make your own "embossing diffuser"
(which embosses "partial" areas
and makes shapes)
and how to use the "Embossing Diffusers"
from the market ...
so here we go...
A-make your own "embossing diffuser" shape..
How to emboss a "Christmas tree" /triangle from an embossing folder, that would normally emboss the whole paper...

step 1: cut 2 triangles (do NOT make any branches, I did it and it was NOT worth it, so just cut a simple triangle) from chipboard and glue them...

step 1:
Tape the chipboard to the embossing folder

step 2:
make the following "Sandwich" using the "Cuttlebug" machine:
plate A + tan embossing pad + embossing folder (with paper inside) + triangular shape taped to the folder + plate B

NOTES:
- the chipboard replaces one of the "B" plates
- the triangular chipboard shape can be "replace" by ANY shape that you would like to make
-IMPORTANT: in this case, you can place the chipboard on top, since it is chipboard it will not be affected by the rollers of your machine.
BUT, BE CAREFUL, if you place the "plastic bought" "diffusers" from the market on top, they will be damaged!!!,
so refer to sandwich below for "bought diffusers" from Tim Holtz...
- the "tan embossing pad" gives extra padding to the sandwich ...
step 3:
the result: is a triangular shape embossed...

step 4:
color the embossed area
assemble card...

View of the group that I made...
remember to embellish the envelope too, front and back!

B- REVERSE:
How to emboss the outer area, leaving "flat" an "oval" shape to be stamped from an embossing folder, that would normally emboss the whole paper...

step 1:
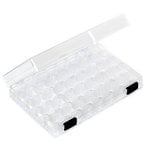
use the Tim Holtz "embossing diffusers" that you can buy
(or make your own with chipboard as I did with my "triangle/tree", simply by die cutting an oval window...)
NOTE:
- the "plastic" on the photo is called "embossing diffuser" and it has an oval hole, this is the area that will NOT be embossed

step 2:
make the following "Sandwich" using the "Cuttlebug" machine:
plate A + Embossing Diffuser + embossing folder (with paper inside) + plate B
NOTE:
-(my sample in the photo is using the "circle/diffuser", resulting in a circle embossed, but you can place the oval window to have the outer area embossed sample of the card)

IMPORTANT: the "embossing diffuser" MUST be placed right after the "A" plate and NOT touching the rollers, otherwise the rollers of your machine will ruin them...
plate A + Embossing Diffuser + embossing folder (with paper inside) + plate B
Below...samples of the "embossing diffusers" from Tim Holtz that you can buy...
Remember: the hole will NOT emboss, leaving a "flat" area for you to stamp if you desire on that area...

the shape (circle, triangle) placed on top of folder will emboss that shape!

for the Big shot watch Video of Tim Holtz using his "embossing diffusers"
A last View...
THANK YOU
for bearing with me until here,
on this busy time of the year...
you can share these photos
on your Pinterest, Facebook, or twitter pages!!!
hover over them,
click on top right symbols...
hover over them,
click on top right symbols...
I will be back on Christmas Eve and Christmas day ....

SUPPLIES
Stampin'up! embossing folder "poinsettia", ovals, photo corner and flower punches and top notch die


How Wonderful Bibiana. I only have the Big Shot and the Grand Calibur. Would it wok with any of them. Enjoy the Festive Season. Hugs Rita xxx
ReplyDeleteYES! sure...follow the same folders as you were embossing regularly...Watch video of Tim Holtz using them.
Deletebibiana
Thanks for sharing. I have tried this before but have completely forgotten about it. Have a wonderful Christmas.
ReplyDeleteOh my these are really GORGEOUS creations!! I love that embossing folder from SU! You've done a fabulous job using it in various way!! Must try it out! Thanks for the tutorial! Wishing you a Merry Christmas! Hugs & Smiles - *Vicki*
ReplyDeleteMy Blog: Stamp Smiles
Wow Bibiana these are spectacular and so beautiful the design look amazing, wonderful work. Bibiana I would like to wish both you and your family a very Merry Christmas and Happy New Year
ReplyDeletehugs
lorraine x
Intéressant, merci de partager! Les cartes que tu as faites avec cette technique sont magnifiques!
ReplyDeletetres reussis tes embossages partiels, bravo et merci pour le rappel bisous
ReplyDeleteWow, Bibliana, this is fabulous and so clever! Love how they turned out! I have not heard of this technique before. This is one of the reasons I like it here - I learn something new! Merry Christmas to you!
ReplyDeleteThanks for this tutorial. Will have to have a go soon and see if I can manage it. Thanks for all your inspiration Bibiana. Wishing you a very Blessed Christmas. hugs, Ursula
ReplyDeletethank you for this step by step,
ReplyDeletePitchoune
Beautiful cards and techniques, love it. Will have to try this, but next year, my Grand Calibur gave out, darn.
ReplyDeleteMerci beaucoup ... Un très Joyeux Noël ... Mes salutations du Québec ... Raymonde x
ReplyDeleteThat is so cool, I especially love the tree, I will hopefully remember that for next year, thanks so much for sharing such pretty projects! Merry Christmas
ReplyDeletetrop belle tes cartes et merci pour le tuto. tu es trop fort. bravo.
ReplyDeletebises et passe un joyeux noel. gros bisous
Tes cartes sont superbes, merci pour le tutoriel. Très bonnes fêtes de fin d'année. Bises.
ReplyDeleteThank you very much for this tutorial. I do not need it for Christmas but it will be lovely for some thank you cards in the New Year. Wishing you and yours a Merry Christmas and Happy New Year.
ReplyDeleteMyrna
Arent you clever. This is totally awesome. Such beautiful cards.
ReplyDeleteThanks so very much for taking time to write up this very explanatory tutorial, and do pictures as well. I've got these diffusers but always have been afraid to try using. You've made it seem very simple to do this with such lovely results. Merry Christmas. Hugs & TFS
ReplyDeleteAbsolut amazing cards here again Bibiana, and thanks sooo much for the tut as well, as we all know, how long it takes to make those and then even taking the time for that just now, when we´re all sooo busy here for the holiday. All your cards here are absolutely gorgeous, I really love them all.
ReplyDeletesuperbe tes embossage de noel, tu es pleine d imagination bravo
ReplyDeletebisous
tu nous a encore gatee avec ton tuto trop cool
ReplyDeletej adore ta carte sapin et de belle explication
de bonnes fêtes pour toi et les tiens
de gros bizou a bientot mon amie
So interesting and beautiful cards................Lis
ReplyDeleteI will have to try this, awesome tutorial! All my Christmas shopping is done and Im off work so your tutorial is perfect timing for me :) Merry Christmas
ReplyDeleteWow! I love it , I will do it my during holidays. So I wish Merry Christmas to all !
ReplyDeleteThese are stunning cards Bibiana and thank you for the superb tutorial..I will have to give it a try..Hugs Carole Z X
ReplyDeleteTrès jolies ces cartes ! De belles idées ! Joyeux Noël Bibiana ! Bises
ReplyDeleteYour cards are beautiful! What a great technique...and a very well done tutorial...thank you so much for sharing.
ReplyDeleteThanks for this. Love the homemade xmas tree. Lovely cards. Hugz
ReplyDeleteI'm very new to embossing folders, dies and die machines! Love this tutorial! I have a Cuttlebug (just got it) and will try this idea! Thanks so much!!!
ReplyDeleteHi this seems a great idea. Is the 'embossing diffuser' the same as an embossing folder? TFS xx
ReplyDelete