I discovered this "new" tool called "Roltap", thanks to a video that Lindsay, a fellow DTM at "Lost Coast Designs" posted in the blog...
After seeing her video I had to have right away that tool, but unfortunately as she pointed out later in another video it turns out that this "new" tool for me, was an "oldie" and that it is a discontinued item:(
So following some of her suggestions, I ran to Michael's and made my own version.
I created my own "Mini Roller Brayer" Or "Roltap" tool...
here it is my take...
What you need to make this fun tool is a bag of foam "marshmallows", from Michael's, a small brayer to switch rollers, (you simply push the red rubber roll to the side); a kitchen knife with a wide blade (to cut the foam; my x-acto knife did not work), some BBQ skewers (not too slim), the beads and that's it...
follow the photo to assemble the tool...
I had a bag of beads and they worked perfectly to hold the foam in place...you can use pearls or other beads, otherwise the roller foam moves and the brayer falls apart.
Then in this very same trip I discovered this "Nifty" tool in the ceramics section...It is a wheel for sculpting, the wheels are in plastic not rubber but it works...
See sample comparison sheet on how they work each one of them...
I decided to make a card, of course!
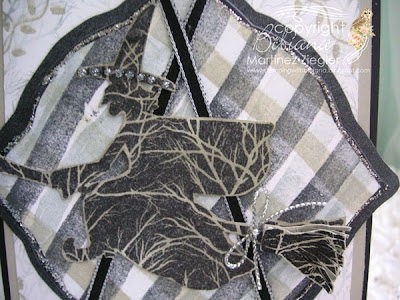
I used this fun "Silhouette Witch" stamp from "Lost Coast Designs", to make this Halloween background card in order to showcase how the "mini Roller Brayer" works...
I first did my background in 3 different color inks (black, gray: "London Fog: Memento ink" and "Pumice: distress ink By Tim Holtz")...
If you prefer straight lines I guess you can use a ruler...but I do not mind the crooked lines... it goes fast, less that 3 min...and I think that's the charm of the background.
I die cut it with a "Spellbinders" label 3 die.
Then I stamped a 2nd panel using a large Background "Three Branches" stamp from "Lost Coast Designs" and I used the "leaf wheel" on the corners...just to use both "new" tools in my card.
detail of the background...
I decided to make a gingham pattern and the broom has several layers to add some dimension...
Hope you will get inspired as I was, ...THANK YOU, Lindsay!
Make sure to visit Lindsay's blog: "The Frugal Crafter" and watch her so energetic and informative video HERE


How fabulous Bibiana. It's such a great idea and I do have a brayer like that lying around somewhere in my stash. Have a Good Day. Hugs Rita xxx
ReplyDeleteI love your adaptation, well done you!
ReplyDeleteThanks for the tip Bibiana. I will look for this the next time I get to Michaels!
ReplyDeletesandy
Now that's a clever tool! Love how you've improvised here Bibiana. Hugs, Jenny x
ReplyDeleteWhat a great idea. I may just give it a try.
ReplyDeleteClever girl...all thanks to LINDSAY - isn't she great! You too have a great find in the Sculpey tools!!! TFS
ReplyDeletePaper Hugs,
Jan
Bibiana:Eres genial me gusta la idea.Abrazos Martha.😊
ReplyDeleteWhat a great card and very interesting tool. Loved your inspiring post. xx Flora
ReplyDeleteAn interesting tool Bibiana and thanks for the information and great card
ReplyDeleteAnne
What a cool idea! I love seeing what innovative ways other people come up with to use things in different ways than they were intended.
ReplyDeleteBest crafty wishes!
Amber
Staying Crafty
Hello Bibiana, it's a great idea. Your card is lovely.
ReplyDeleteThanks for the tutorial x
ReplyDeleteThis a such a nice idea...thanks for sharing this great tutorial, And also, thank you for the nice comments on my blog!
ReplyDeleteso creative Bibiana, you can really create a lot of texture with your new tool. I always love finding new creative ideas too!! :)
ReplyDeleteoh, and your Halloween design is wonderful, love this!!
ReplyDeleteThat mini tool for ceramics would make neat. looking ribbons. Great teaching!
ReplyDelete