
**First the project...**
A Halloween Twisted Easel card...
fun shape to display the gorgeous "Petaloo" Flowers paired with some die cuts....
fun shape to display the gorgeous "Petaloo" Flowers paired with some die cuts....

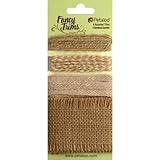
I die cut the "midnight witches brew" frame into a patterned paper, secure it to the rectangular front panel and embellished with black cotton paper flowers and "Kraft" burlap flowers and butterflies from "Petaloo"

NOTE:
On the folded card, the front panel was cut into a square shape from where the front rectangular panel will be adhered.
I made some loops with the burlap cord/trim...and overlap the flowers...

loops..

details of the flowers...

Side view of the twisted easel card

Front panel...


**Now onto the tutorial...**
_____________ o _____________
101 on how to make ANY EASEL CARD
Easel card cards are very easy to make...once you master the main folds....
General rule:
1- from a folded card, (any shape: rectangular, square, circle, octagon etc...)
2- Fold in half the front panel of the card (to make a support: the easel)
3- into which a separate front panel (of the same shaped used for the base) will be affix...
To make ANY "shaped" folded card ...
Fold you paper and place underneath a "desired shaped " die onto the cutting machine.
Cut below the top of the die to make hinge...see photo

The folded card is cut....

Below are some samples of a heart, a pinking edge circle, an octagon shaped folded cards, cut following the same process as above...
Fold in half the font panel
Note: if you desired a "twisted" easel, make that fold in a diagonal direction

affix a separate single shape to this "easel"...of the same shape as you main card....

view from the side

samples of several shaped easel cards....

when folded flat...

In today's case, I wanted a "rectangular" front and base card...
(usually these type of cards are square)....
For this, The base/front panel NEEDS to be cut in a "square"
then folded diagonally to place the rectangular front panel in a diagonal way and make a rectangular "Twisted Easel Card"....
Note: You can make a "square" folded base and attach the rectangular panel to this square...
you will have then a 'square' base with a rectangular front panel...
in my case I wanted BOTH base and front panels to be "rectangular"
folded to send flat

A last View...

Ok, my Friends thanks for the visit
See you soon for some other craft projects...
See you soon for some other craft projects...
SUPPLIES


Such a wonderful Halloween card Bibiana and those Black flowers really add to it,
ReplyDeleteLove & hugs
Jacquie J xxx
http://jewelscardcraft.blogspot.co.uk/
belle carte, A+
ReplyDeleteFun card and useful reminder about all the different possibilities with easel cards.
ReplyDeleteoh j adore ta carte elle est trop belle bravo
ReplyDeletebisous
Magnifique carte, merci pour le tuto. Bises.
ReplyDeleteelle est extra cette carte avec la sorcière au chaudron.
ReplyDeleteBonne fin de dimanche
That is amazing . your presentation break down is much appreciated...Lis
ReplyDeleteAwesome. Thank you for the tutorial.
ReplyDeleteComme tu es généreuse avec ce tuto si bien fait .
ReplyDeleteMerci et félicitations pour ta carte si bien réalisée !
Hi Bibiana love this card, such a brilliant die aswell ! I love Halloween x
ReplyDeleteBibiana,lindo tutorial lastima q no tenga los elementos necesarios :( me encanto tu tarjeta!!
ReplyDeleteDéjà une bien jolie carte pour Halloween, j'aime beaucoup les couleurs!!!
ReplyDeleteBelle journée, bisous
Great tutorial! I have make easel cards but here is new information to learn! Great! TFS
ReplyDeletewow - this is a gorgeous card & your tutorial is so helpful! Thank you for sharing, I am definitely going to have to try this technique.
ReplyDeleteQue bonita, me ha encantado!!
ReplyDeleteGracias por el tutorial!
Un besazo y feliz finde guapa!!
What a great halloween card! And thanks for the lesson for making easel cards. Something i will have to try out.
ReplyDeleteMoi qui adore les cartes chevalets! merci mille fois pour ces tutos!
ReplyDeletexxxx
Very cool, that paper you cut the die out with is perfect for this and I love the black with the burlap flowers!
ReplyDeleteAlways love your tutorials Bibiana. This one is no exception. Excellent.
ReplyDeleteLove, Hugs and Blessings
Jim
Hi, Bibiana, and so nice of you to stop by my blog! I'm delighted to see yours and love the tutorial for the easel cards! I love your work and will visit again! Hugs!
ReplyDeleteHi Bibiana thank you for visiting my blog it was so good to hear from you, Bibiana this is one fangtastic, spooky Halloween card love how the backing paper shows up under the die cut your tutorial is brilliant thank you for sharing.
ReplyDeletehugs
lorraine x