
Memory Box is showcasing all through this week at the 3 blogs, projects done by all the DT members featuring "Imagine Crafts Products"...
Here it is my take...
a "Faux - Amate" paper card

pin it:

But Let's have 1st a word about "Imagine Crafts"...
It is difficult not to know "Imagine Crafts" products...you may be more familiar with the name "Tsukineko", "Imagine Crafts" is their "new" name...but they carry the same products (inks and craft accessories) that we all know such as: "Stazon", "Versamark Ink", "Versacolor", "Versafine", "Brilliance" and many many more...
They have added some great NEW ones, such as "Memento Luxe", "Delicata" inks and all the "Radiant Neon Pigment Inks" among many more...
So Today, I posted this project at the English blog for Memory Box: "Outside the Box" (PM Post) using Memory Box products along with some "Imagine Crafts" inks.

If you want to check out my other takes for the language blogs:
I have 2 other projects made using both company products...
As for my project here today, to better understand my post, I have to talk ...
1st, about the Name:
what is "AMATE"?
"Amate" is an adapted word used in Spanish from the Nahuatl language (from the Aztecs).
It is a form of paper that it has being produced in Mexico since the Pre-Hispanic times.
It was and still IS handmade by the "Otomi" indians of Mexico.
Back in the Pre-Columbian times these were used to paint codices depicting stories, events or astrology.
Nowadays we can purchased them in any craft market in Mexico and they depict colorful nature scenes.
Here is one that I have ...

The paper is made from the bark of the fig tree giving unique shades of color and pattern to each sheet...see detail below...

and this frame made with "Amate" paper
was the inspiration for my card and for this tutorial...
How to make "Faux-Amate" paper...
Let's go step by step....
1- take some brown wrapping paper, wet it, crumple it into a ball, open it, let it dry!

2-add "Memento inks" in "rich cocoa" and "desert sand" shades
this is how it looks...

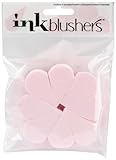
3- place and secure the "Memory Box- Bloom" stencil over it and sponge with "Inkblushers" sponges the "VersaColor" ink in "Lapislazuli" color
note: these inks are pigment, very juicy, vibrant and great for this technique!

4- Wash the stencil as you will use it next...
in a tray place it flat under the sink and brush it with a nailbrush using mild hand soap.

5- dry the stencil by placing it flat inside a roll of paper towels...

6- place and secure back the "bloom stencil" and place inside the "Brilliant Peony". sponge the center with "Memento Luxe" in white

7- outline with a black marker the edges, doodle some designs and with white acrylic ink add dots

8-final look...

9- add "faux" stitching with white acrylic paint and a pattern tracing wheel (used for "quilts") along the 4 edges

10- mount the final project on some cardstock...

here is how I store all my "VersaColor" cubes and "Memento" ink dew drops...

And here we are we have created a "faux-amate" project!
I hope you will give it a try

remember to see my 2 other projects!
Thanks for the Visit,
love your comments
and tomorrow
I will be featuring a special post
with a well known company as well,
stay tuned!!!
closes on Nov. 4th
sponsor: Paper Crafter's Library
sponsor: Paper Crafter's Library
SUPPLIES


This is stunning Bibiana, what a great technique.
ReplyDeleteWhat a great surprise you finally getting the parcel back!!! How long has it taken? Anyway I am happy that it has been returned to you at last.
Love & Hugs
Jacquie J xxx
http://jewelscardcraft.blogspot.co.uk/
Premièrement, merci de nous montrer comment travailler avec ces 2 stencils qui se complètent si bien. Quand on les voit en boutique, je me demande toujours quoi faire avec ! Et bien là, c'est plus que parfait! Merci et c'est toujours très beau!
ReplyDeleteGorgeous technique and effect. Love it. Hugz
ReplyDeleteFantastic technique ! Such a fabulous card xx
ReplyDeleteencore une très belle carte! bises
ReplyDeleteta carte est une oeuvre d art j adore trop belle braavo
ReplyDeletebisous
Encore une superbe carte, merci pour le partage. Bises.
ReplyDeletestupéfiant! j'adore et je vais essayer , trop top top ! bises
ReplyDeleteThis is really lovely - like the texture and colours
ReplyDeleteWow, beautiful technique! This looks amazing! I haven't heard of this before - I always learn something new here! Thank you for showing all the steps! And I really like your stitching done with the tracing wheel - what a great idea!
ReplyDeleteVery pretty!
ReplyDeleteSandy xx
I'm playing catch up on visiting tonight, and saved your blog towards the last of my comments. So glad I did, because then I had time to read through the post & enjoy the tutorial. Love this look, the beautiful card you've shared, and the fascinating explanation about the amate. Totally new to me. I will do my best to try this technique, as it is so unusual. Your card was gorgeous...I love Tsukineko, & their entire line of ink products. Delicata is my favorite of the gold inks, even more so than the Brillance Galaxy gold. Also love the MB dies & stencils. So thanks for a most informative post as well as a magnificent card. Hugs
ReplyDeleteBeautiful! Making your own paper really added so much to the look of your card. Lots of yummy texture. Hugs!
ReplyDeleteAll your cards today is absolut gorgeous Bibiana, and thanks sooo much for the tutorials on the different blogs here too. I´d never heard of this before either, but is definitely going to try it out sometime soon, that´s for sure. I love, how it looks and could see a few different things, it would look great for too.
ReplyDeleteC'est magnifique ! J'aime beaucoup les idées artistiques que tu développes, le papier, la peinture au pochoir, la roue pour la fausse couture, etc. Le résultat est sublime ! Bravo l'artiste et bises. Micha
ReplyDeletece que j'aime chez toi c'est que tes creas sont toujours inventive... le resulat jaime beaucoup aussi, bisous
ReplyDeleteLove the "Otomi" Indian picture. Your card is wonderful. It seems simpler than it is. Love the tutorial. Thanks for sharing it. Jim
ReplyDeleteEncore une création de toute beauté Bibiana ! Et une nouvelle technique ! J'ai bien envie de tester cela aussi ! Je me demande quand j'aurai le temps mais qui sait ! En tout cas, j'adore le résultat et cette carte marron et bleue est vraiment superbe ! Bises
ReplyDeleteBeautiful cards on all your blogs. I do love the history you share so very interesting and uniquely you for sure.
ReplyDeleteOh Wow that is Gorgeous, so neat to hear about the story behind your projects too, neat details and clever using the paint and the wheel, I use one of those before I hand stitch on cards to get my stitching straight :)
ReplyDelete