
I am bringing to you today this fun technique, using again stencils...
and it is
Dry embossing with your stencils...

like it? pin it: 

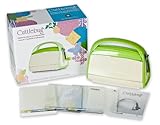
for the cuttlebug use the following sandwich:
A plate+metal adapter sheet+B plate + plastic stencil of your choice + cardstock (I used watercolor paper) + 2 rubber mats + B plate...
NOTE: every machine is slightly different, so practice before and decide weather you need 2 rubber mats or not or even the metal adapter...
run through the machine and the result is an embossed image ...
I sponged over it with green, blue an brown inks
REMARK: The emboss paper has a less raised area than with embossing with a regular plastic embossing folders, but it is good to know that you can use your stencils too for this...it gives another use to your regular stencils...\
I created this window card ...perferct for a masculine birthday, where I used the new released stamps from Memory Box from the holiday 2014 collection

pin it:

and I used the technique of dry embossing on the front of the card
paired with a "patina" look technique for the raised areas...

step by step
1- dry emboss with the stencil your watercolor paper
(I used watercolor, because the result was better than with regular cardstock)

2- for Patina look:
-sponged ink colors (blue, green and brown) on top to make the raised areas pop even more...
-add versamark ink on some spot over the raised areas
- sprinkle some gold embossing powder, shake excess
- heat set with heat gun
the result is an old looking patina (photo below)
3- cut an oval window on 2 papers, the card itself (that I sponged in blue ink)
and on the embossed patina paper.
Attach this later to the card

4- add (in white) holy die branch to the front (new die from MB from The 2014 holiday collection),
ribbon and buttons to finish the card

5- for the inside: mask the areas that you want to sponge.
first, place an oval shape paper on the center of the card...
you will be working on the outer space of your card.
I used the oval from the window that I cut earlier as a mask and distress/sponge all the card with blues, greens and browns inks (outer space)
stamp sentiment bottom corner...
remove this oval mask
place a paper with an oval opening, use it as a mask,
now you are working on the center area, which is white ... distress with inks...
stamp does and cattails
remove this second outer mask...
add brown dots with a fine point marker around the oval to define that area

6- on the center oval; I stamped several does, by masking the first one then added some grass.
remember your outer mask is in place ...when done stamping remove mask.

and some other dies to decorate the corners...and that's it...
lots of masking...
A last view...

OK my friends, after announcing all the winners from the blog blitz, Now I have all the addresses gathered from all the winners ...
now it is just question to go to the post office and mail the prizes...:)
so let me know when you will receive your candy...
thanks for the visit and much appreciated comments...
I hope you enjoy today's card and techniques!!!
I hope you enjoy today's card and techniques!!!

SUPPLIES


What a gorgeous project, Bibiana, that is perfect for so many occasions!
ReplyDeleteRegina*
Gorgeous Bibiana, love this card. Great instructions on how to do both techniques. I will have to try this with the Grand Calibur.
ReplyDeletehi Bibiana, beautiful creation, love this this gorgeous deer image and embossing, great colour tones.
ReplyDeletepam
Lovely effect and pretty card
ReplyDeleteMagnifique carte! J'adore! Trop joli le rendu! Bises
ReplyDeleteMagnifique carte, merci pour ce tuto. Bises.
ReplyDeleteWho wouldn't love this card? Bibiana, your such a dear, and I do so thank you for the instructions. I even received them in my e-mail and that is always a blessing. I cannot thank you enough for all your beautiful cards and I have a folder just for your cards. NOW, I am off to try this stencil procedure.
ReplyDeletec est une bien magnifique carte embosse j adore
ReplyDeletegros bizou
Fabulous! Thank you so much for sharing this technique!! The card is beautiful.
ReplyDeleteAren't you clever. I love your card. It's so perfect
ReplyDeleteI totally love this card here Bibiana it´s so gorgeous and sooo well made.
ReplyDeleteTa carte est superbe Bibiana ! Merci pour la technique, je vais essayer ! Bises
ReplyDeleteGorgeous project and great techniques. I just purchased
ReplyDeletesome new MB stencils. Going
to play with them tonight.