hover over

HOVER OVER ANY PHOTO AND SHARE IT ONTO YOUR
PINTEREST, FACEBOOK OR TWITTER ACCOUNTS


Showing posts with label organization. Show all posts

Saturday, August 26, 2017

Background Technique with Re-inkers and Alcohol

Hello Dear Friends:

This card was published at the Spanish blog: "A crear se dijo!"...for "Memory Box"...
The technique that I used is a fun and very pretty one...

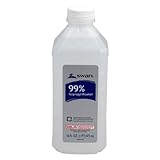
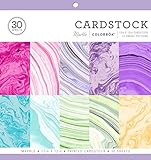
It is made with "specialty stamping" paper from "Ranger", some re-inkers and plain rubbing alcohol...to give this "marbled" effect!

gracias thank you crane card front

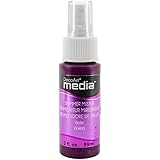
The background, as I said, was created using "specialty stamping paper" from "Ranger", some re-inkers from "Wendi Vecchi" line of archival inks... and alcohol...

technique step by step:
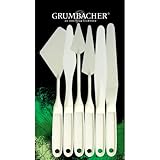
Step one: place some drops of ink "Archival" with some alcohol on a craft sheet...mix with a spatula/painting knife

technique step 1: alcohol with re-inkers

step 2:
place the "specialty stamping paper" (important to use this paper for the technique)
on top of mix and "grab" some color...

technique step 2: alcohol with re-inkers

step 3:
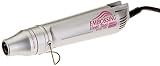
dry heat with a heat gun
repeat process until you like what you see...

technique step 3: alcohol with re-inkers

here are some samples using different combinations of colors of re-inkers...

technique samples with alcohol and re-inkers

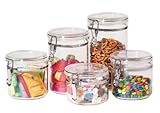
and here it is how I store my re-inkers; on plastic food containers...

re-inkers storage

Detail of the "marbled" background....

gracias thank you crane card front

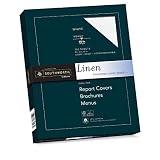
All framed with the scalloped stitched frame from Memory Box ...on linen cardstock.


gracias thank you crane card side view

I hope you like the technique!
To see other samples using this same technique CLICK HERE


Thanks for the company
until next time!

SUPPLIES

"Gracias cursive" die from Memory Box.

Saturday, February 18, 2017

How to turn a plastic basket into a rolling carrying tote for 12x12 paper pads

Hello Dear Friends:

Today I want to share with you a storage solution...for the 12x12 paper pads...

Over the Holidays I got crazy and I got several 12x12 paper pads...
Here in the USA the stores in my area were having a huge sale on them and these paper pads come with so many pretty designs and special treatments that I decided to get them...
Guilty me :)...

But the problem was that my storage is already full
as you can see in this post: "How to organize your papers"...

so I had to come up with a solution right away for these extra items!!!

and here it is my idea...
to turn a plain plastic storage bin that I got at "Target", into a rolling carrying tote easy to move around my room...


These plastic bins have the perfect measurements for my 12x12 paper pads...


Organization:
as you  may know I have on the side on the right column of my blog a category called:

"Craft Room Organization", 
in here you can find all sorts of idea organizations 
so I invite you to have a look and maybe you will find some solutions for your stamps, inks, dies, stencils, paints ...and ... paper!

for my tote...I got it like this...from the store...


I ask my husband to cut a piece of wood that you attach with screws to the plastic from the inside


and then you add/screw the wheels on the bottom


standing


Here it is how it looks in my room ...
right in front of the rack of 12x12 paper sheets...


the carpet is not a problem...
I pulled by the handles and it rolls very well so I can move it anywhere in the room


 last view


I hope you like my idea 
and that it can help you to get organized!!! :)

See you next time...
Thanks for the visit, lovely comments
and let's plan for another crafty project...


Supplies 

note:
the basket from "Amazon" (see supplies below)  is 2'' smaller that the one that I got in "Target" but the paper pads will fit as well...for the ones of you that do not have a "Target" near you.
mine is from : "Target": "weave extra large storage bin"


Sunday, January 10, 2016

How to Organize Your Color Spray Misters

Hello Dear friends:

Do you want to know 
how do I organize 
my "Spray Misters from DecoArt"?


here it is how it looks... 

I made a chart for quick reference and...


made some bouquet of flowers.

Here it is what you will need:
white paper flowers; bamboo skewers; white labels; a container and of course your sprays...


- Spray one colors on each flower;
-Atach a flower to one skewer;
- Write the name of the color on a white label
- Adhere to one stem (bamboo skewer)
- finally place all your flowers in mini glass milk bottles...(I bought them at the supermarket at the flower section) but You can use any small bottle or use your own container...


 here it is a closer look of all the flowers... in display for easy reference ...sometimes it is not evident what color is inside the bottle...


I hope this can gives you some ideas on how to organize 
your spray misters 

and at the same time decorate your room 
and have a nice bouquet of flowers...

Click here: For the tutorial on how to use these sprays and make backgrounds for cards 

Thanks for the company


SUPPLIES