hover over

HOVER OVER ANY PHOTO AND SHARE IT ONTO YOUR
PINTEREST, FACEBOOK OR TWITTER ACCOUNTS


Showing posts with label faux stained glass window. Show all posts

Thursday, September 22, 2016

Fall Faux Stained Glass window on Glitter ...

hello Dear friends:

Let's do some Fall cards...

The technique on this this little glitter Bird looks almost like a  
"Faux" stained glass window technique...

usually this technique is done on acetate paper for the window effect (windows on the cathedrals)...
but here it is on glitter paper
which reminds me of the glass used on "Tiffany" lamps... more opaque
don't you think?

fall glitter bird front

to make it, it requires a few steps...
here we go...

1- prepare a whole sheet (81/2" x 11") of glitter, you will have extra for future projects.

on an adhesive sheet pour white "Ritz" extra fine glitter
put excess glitter back on the jar...
**good news: to avoid this step, at the excrapbook expos they sell these pre-made glitter sheets (I got them at the "KrazyKreations booth)
or try using glitter sheets sold in the market as glitter paper
(I have NOT used these papers, but I will give it a try, I do not know if the glitter will damage the nibs, because these sheets have more coarse glitter...I will have to try)

2- die cut 3 shapes and glue them together, (for depth)
glue them to the glitter paper
I did my bird in black cardstock
**note:  you can use stickers instead of dies...

fall glitter bird glitter sheet


3- start coloring and blending with markers inside the white area...
I used "Copics";  this type of glitter "Ritz" is so fine that it does NOT damage/clog your pens..

fall glitter bird glitter sheet colored

4- finished colored bird,
cut around and use the extra sheet for extra projects...

colored bird

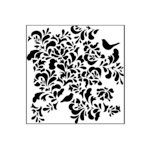
5- make the background,
I used an stencil, sponged the ink through the stencil
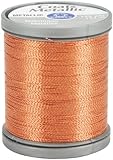
and wrap some fine copper thread around some squares...

fall glitter bird background

detail
fall glitter bird detail bird

last
fall glitter bird flat view


Thanks for the visit 
hope you will try this amazing technique...
"faux" stained glass window on glitter

fall glitter bird card

for a card on "faux" stained glass window click HERE
 
until next time...

SUPPLIES

Wednesday, September 2, 2015

Lavinia's Challenge # 9 - Hot Bright Colors

Hello Dear Lavinia Friends:

Hot Briht colors is the theme for this month challenge over at Lavinia's...
Oh boy! those colors are difficult for me...but here it is what I came up with...

2 cards by lavinia challenge # 9 hot bright colors

One card is made with "Distress" inks and the second on the right is inked with "Neon" inks....


I am using the NEW stamps released this August...
and in this card I am featuring "Make a Wish", isn't she so beautiful?

lavinia bright colors distress inks make a wish stamp front

The background was sponged with "Distress" inks and splatter with water...

I "dressed" her, (paper piecing technique) with a hot bright pink dress...
Cardstock: These papers come in a pad of 36 sheets in "Neon" colors and are double sided, check supplies below...
and I used Linen white paper for the base of the card...great for inking and leaving some texture

For the dress...
I stamp with "Versamark" and clear embossing powder the section oh her dress on the neon card stock pink paper and I cut the "dress" apart...

I embellished her neck by placing a "plastic like" embroidery thread by "Sulky thread".
This thread has the particularity to curl like gift ribbon...but it is used for quilting and embroidery...very thin, slippery and it comes in various metallic colors ...
I discovered them recently and I am loving them!!!
Check out their site: "Sulky"

lavinia bright colors distress inks make a wish stamp dress


For the wings (faux stained glass window technique) I stamp with black "Stazon" on a clear piece of acetate her wings and on the back placed liquid glue with a pen and sprinkled some glitter.
Note: let dry every time that you place a different color of glitter, to avoid contamination of colors...
 

lavinia bright colors distress inks make a wish stamp dress

lavinia bright colors distress inks make a wish stamp wings

Embellished the card with sequins, pearls and "rick rack" ribbon
a last view...

lavinia bright colors distress inks make a wish stamp last view

The second card was done with "Neon" inks, which by the way are on SALE at Ellen Hutson, check link below in supplies!

lavinia bright colors neon inks dragon pods stamp side view

Stenciled the background...
Stamped the NEW  "Dragon Pods", twice and twisting the stems...add black glitter and some black twine.

lavinia bright colors neon inks dragon pods stamp detail

The white section was embossed with an embossing folder by "Brenda Walton/for Sizzix"...and inked over it with the ink pad directly onto the embossed raised areas...

lavinia bright colors neon inks dragon pods stamp front


Discover all the gorgeous designs 
by my fellow DT friends HERE...

Play along with us!
you have the chance, as every month, the possibility to win a £40.00 certificate to use at Lavinia's site

So get your fingers inked 
and see you at Lavinia's challenge Blog!

Thanks for the visit 
See you soon for another craft project! 


Follow on Bloglovin


SUPPLIES:

Lavinia: "Make a Wish", "Dragon Pods",