hover over

HOVER OVER ANY PHOTO AND SHARE IT ONTO YOUR
PINTEREST, FACEBOOK OR TWITTER ACCOUNTS


Showing posts with label flowers. Show all posts

Wednesday, September 6, 2017

Paint your Own Coffee Mug

Hello Dear Friends:

One of the lessons with my Dear painter Teacher, Carl Larson, was to start designing your own piece...
and here it is what I designed...Y created this circular array of roses on canvas paper to be inserted later into my Coffee Mug...  and have a Unique mug...

paint your own starbucks coffee mug with decoart acrylic paints

The style chosen to start creating your design was "Canal Boat", painting.

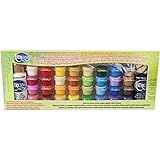
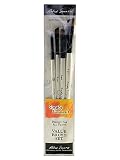
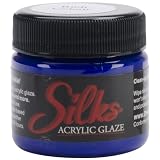
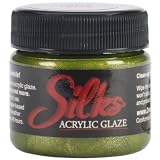
First I gathered my supplies: a canvas pad of paper, some acrylic paints from DecoArt, Americana and a mug from "Starbucks"...(top left corner of photo)

paint your own starbucks coffee mug on a canvas pad

here are some of the steps...

- Trace the shape of the insert from the mug (included in your mug) onto the canvas paper...
- Paint the whole background with acrylic paint in Black (or dark green: traditional background colors for "Canal Boat" painting)
- paint a cluster of roses and leaves in primary colors ...in a circular and symmetrical way
circles for the roses and ovals for the leaves with on top some comma strokes...

paint your own starbucks coffee mug on a canvas pad step 1

- add some filler flowers and various sizes of comma strokes to suggest movement

paint your own starbucks coffee mug on a canvas pad step 2

 - complete your design by adding strokes on top of strokes... (for shadows and highlights)

paint your starbucks coffee mug on canvas pad with canal boat painting style

- here are some of the basic strokes learnt in class for this type of painting:
how to make roses in primary colors,  some leaves and filler flowers...

 canal boat painting style strokes

- when finished, cut the shape of your mug

 canal boat painting style on canvas paper

- insert canvas onto mug

 canal boat painting style on canvas paper insert onto mug

and here it is my finished Mug
front

starbucks coffee mug decorated in canal boat painting style
back
starbucks coffee mug decorated in canal boat painting style; back

side
starbucks coffee mug decorated in canal boat painting style; side

History Note:
This style of painting is also known as "Narrow Boat Painting" and it is the colourful folk art from England that was used to decorate working narrow boats used on canals.
By the end of the 19th century it was common practice to paint roses, various other flowers, castles, churches and cottages on narrow boats, their fixtures, fittings, furnitures and even utensils, known as canal ware.

Instead of using a more "traditional" utensil as in old times (such as buckets, milk cans, metal boxes etc)  I decided to give to this "old" style  a more modern approach and use an every day mug from "Starbucks"...
An old idea combined with a 21st century every day utensil...


starbucks coffee mug decorated in canal boat painting style with decoart paints

I hope  this gives you some ideas on how to incorporate the old with the new
and create your own custom coffee/water mug!


Thanks for the Company
and see you next time 
for another craft/painted project ...

SUPPLIES 


Wednesday, August 23, 2017

Thank You Cards with "Silks Acrylic Glaze"

Hello My dear Friends:

Summer is coming to a slow end...students are back in school; work is starting again, summer life is fading little by little...and even the stores are announcing next seasons: they are ready for "Halloween, Thanksgiving and even Christmas" ...how sad is this? We are always running against time...

Today I would like to share a set of "Thank You" cards that I made for the language Blogs (Spanish and French) for "Memory Box"...using "Silks Acrylic Glaze" for the backgrounds...

This first one was made for the French Blog: "Un brin de Créativité" ...

merci thank you card front

I painted the background with "Silks acrylics glazed" jars...see the shine!!! I love these little jars!
Just grab a paint brush, take some paint from the jar and place some strokes on your paper...I used a heavy (100lb) card stock in white but you can use also some watercolor paper if you desire...

merci thank you card side view

I added  three die cuts in white paper and Voilà a very "artsy" card!

merci thank you card side view

This second card...was done in the same way...just with some different colors for the background...

***Note:
The difference of these paints with "regular" acrylic paints (from "DecoArt Americana" for example  or any other acrylic paint) is that these come with a glaze, the shine is very intense and when mixing colors they are not "muddy", because of the glaze in them...
They come in small jars...and the paint is very intense, condensed and thick...
so you just need a small amount of paint in you brush....

gracias thank you circle card front

Detail of the painted background! see the shine?...in person it is really beautiful!
I used some die cuts in parchment paper for the wreath...

gracias thank you circle card detail circle

I hope you have enjoyed this set of thank you cards...and give these paints a try...You will not regret to have try them, I am sure that you will use them many times as I have done so...
see them on the supply list below...

For samples using these paints click HERE


Thank you for the company 
and see you next time...


SUPPLIES

NOTE: The "merci" die cut is on SALE, get it before it is gone!!! (it will be a retired die very soon)

Tuesday, August 8, 2017

Inlay flower

Hello dear Friends:

Another card using the inlay technique...

inlay flowers front card

I love how this technique makes the card look so beautiful...

inlay flowers detail card

The doily frame was a bit smaller than the perimeter of my card so I made a slit (between flowers) and voilà, the frame could be adapted to the size of my other panels, otherwise the doilies would of being on top of my grey panel
You can barely notice the slit between flowers...

inlay flowers detail frames

I used 3 different frames the one with tiny scallops in white, the 2nd one in grey paper with a stitch border and the doily one...

inlay flowers side view


Thanks for the company...
and specially for the lovely comments that you take the time to leave me here...
It is always encouraging to hear from you...
SUPPLIES

Petite flower bunch from Memory Box;
*another option of flower can be found on the supply list below