hover over

HOVER OVER ANY PHOTO AND SHARE IT ONTO YOUR
PINTEREST, FACEBOOK OR TWITTER ACCOUNTS


Showing posts with label winter. Show all posts

Tuesday, January 10, 2017

Watercolor Zig Clean Color Winter Thank You

Hello My friends:

Thank you, Gracias and Merci...
so much for the loving and caring words for the passing away of my dear companion, Sasha...

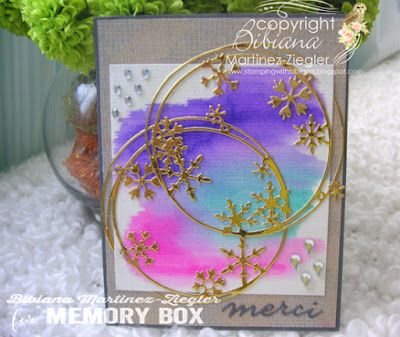
watercolor winter thank you card front

It is hard ... I admit... and at every moment I have her in my mind...
But I keep myself busy and you know what? making lists and checking all what I accomplished in one day...gives me a feeling of fulfillment and satisfaction that helps me with the day to day...

So I strongly recommend you this practice...make a list of your "TO DO's", do it as much as you can...and focus at the end of the day on what you did...and start over the next day...

watercolor winter thank you card detail

I am still in grief, no denial in this, and in pain but at least I force myself to focus on the things that need to be done...

A winter thank you card...
the background was done with watercolors, with my "Zig, Clean Color", watercolor brush pens from "Kuretake"...
I love these markers so easy to use! and the colors are so vibrant!

watercolor winter thank you card side view

and I use twice the "Memory Box" die "snowflake ring"


Ok my friends hope all is fine with you
and I will see you  next time for another crafty project!


SUPPLIES


Tuesday, December 27, 2016

Winter Birthday Scene

Hello dear Friends:

These "collage" dies are perfect for those winter quick cards...

Christmas scene front

keeping it simple...

Christmas scene detail

This card can be used as a birthday card for those babies born in winter or to send a quick winter hello

Christmas scene card

Hope you had a wonderful Christmas time

But Remember, Christmas is not over yet...
we are in the so called 12 days of Christmas 
finishing on the 6th of January with the arrival of the Magi
 
Thanks for the visit...

Supplies

Thursday, September 15, 2016

White Christmas ...

Hello My friends:

And I continue to show you some cards made with these "Oval frames" dies from Memory Box...
This time I made a Christmas card all in white...

white christmas card front

some steps on the assembly...

die cut all the elements in different shades and textures of papers in white...to give some more interest and depth...

white christmas card dies

start assembling your dies

white christmas card assembly

finished card
white christmas card finished

 detail front: glitter, shiny, textured and linen papers all in white...

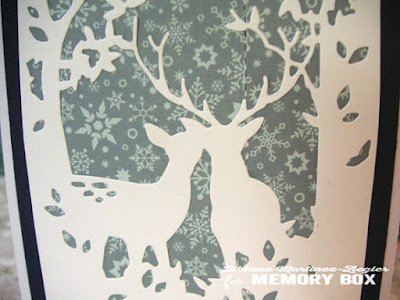
white christmas card detail deer

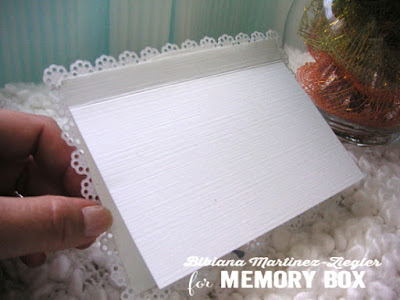
detail of the back
white christmas card back

final view

white christmas card last view

To see my other "Oval frame" cards, just scroll down

white christmas card last view


Thanks for the company
and until next time...
 
SUPPLIES


Wednesday, January 6, 2016

On the 12th day Of Christmas...it's Epiphany Day!

my true love gave to me an...

"Epiphany Card"

ephiphany 3 kings card side

On the 12th and LAST Day of Christmas
Epiphany day 
it's being celebrated in many parts of the world...

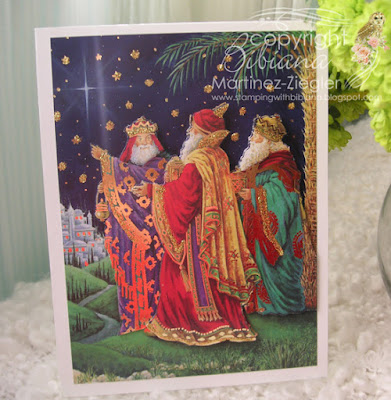
ephiphany 3 kings card front


In México, Argentina and many other latin countries 
for example today it's a big day of celebration 
and all the children receive lots and lots of toys...
in commemoration of the adoration of the magi 
that came to pay respects to the new born king by bringing him gifts!

In Spain and Puerto Rico big parades through the city are being held 
In France and Germany, it's a public holiday where you eat special "king's" baked cakes
and in Russia, in the Orthodox church Today it's Chritsmas...
  _____________ 0 ________________


as for my card: 
I used the technique called 
"PaperTole and 3D decoupage"... 

ephiphany 3 kings card front

Definition: "This is a unique and creative 14th Century French Craft using 4 or more copies of the same print, (of your choice), then cutting, shaping and layering the identical pieces to create a 3 dimensional piece of art."

I "RECYCLED" commercial Christmas cards and I used them in making "unique" 3D handmade decoupage cards!
After Christmas, it's the perfect time to go and buy boxes of cards on sale...(or use those cards that you get in the mail for free)

Note: the image has to be the same in order to cut out the pieces....and layer them to create the 3D effect...

How to:
Get a box of cards with the image of your choice. I got the Kings...
You need at least 3 cards with the same image. You can use more, to create greater depth...
- Card #1 is the base of the card. Card # 2 and 3 will be cut out..to be used for the different layers.
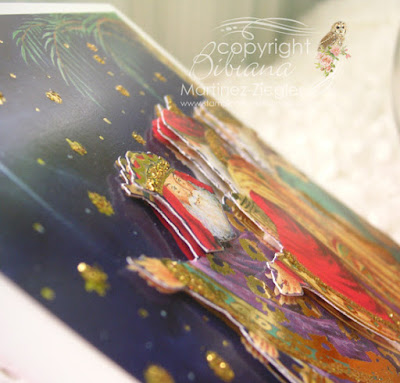
- Card # 2: cut the dresses/silhouettes of the magi. Mount the silhouettes on the "base" card. This is the 1st layer.
-Card #3: cut two heads and one magi. Place these pieces on top of the 1st layer, this will be your 2nd layer...
You can continue placing layers on top of layers...
in my case I used 3 cards to make one card...3 were enough...

ephiphany 3 kings card detail 3D


On a Personal Note:
*** This card was made a year ago...
And I am very glad that I did it...because now it was the perfect time to use it on my blog!...
I have to mention as well that for this technique you need to have good cutting skills, eyes and hands in good shape.!!!

I obviously could not have done this card today in the condition that my hand, thumb and tendons are!
Tendinitis takes a long time to heal,  my right hand, it is "healing" but very slowly ...
The thumb hurts a lot and it has lost most of its' strength...so I am glad that I did it back then...This card came to my rescue for Today's post and current condition!!!...
This goes to show that you never know for what you are doing what you are doing...
but somehow everything has a reason, place and time to be!!!...

I  repeat myself this again and again...in order to cope with "this" "temporary" disability that has "appeared in my life" now...
I do not know why and how it came to be but...it must be a reason...that maybe I will discover down the road!
I know today that not being able to use this hand has "slowed" me down quite a bit, which is very frustrating but who knows... maybe I needed this!.....
Exercise the virtue of "Patience", let things "BE"
and learn how to use more the left hand and right hemisphere of my brain, ja ja ja!!!

This being said...


Many thanks for your company during these 12 days of Christmas
and I will see you for more crafting projects!!!

I hope you enjoy this "NEW" or "OLD" technique!
Have a wonderful king's day!


if you would like to see the meaning of the 12 days of Christmas and the song 
go to the post:


***Note: visit me at the language blogs (French and Spanish) for Memory Box only this week!
I will be featuring all the NEW winter release...
and do not forget to leave me a comment there for the chance to win a die!!!

Tuesday, January 5, 2016

On the 11th day of Christmas...

my true love gave to me some ...

"Northern Lights"


to get the effect of  the "Aurora Borealis":

I sponged 4 different colors on a white oval piece of paper.
I started sponging "diagonal lines" in yellow, 

then added some turquoise
cover them with some purple ink 
and finish the whole edges with navy ink... 


all the colors get mixed and gives this effect...

During "The 12 days of Christmas"  
I will be posting each day a different card. 

***Note***: 
I have published these cards at the language blogs for Memory Box.
 But  I did not had the chance to share them here in my blog due to my injury... 
since I am not crafting much lately 
I decided to post them during this special time of the 12 days of Christmas....

so you will find some from Thanksgiving and Christmas cards mixed...


if you would like to see the meaning of the 12 days of Christmas and the song 
go to the post:


***Note: visit me at the language blogs (French and Spanish) for Memory Box only this week!
I will be featuring all the NEW winter release...
and do not forget to leave me a comment there for the chance to win a die!!!


SUPPLIES