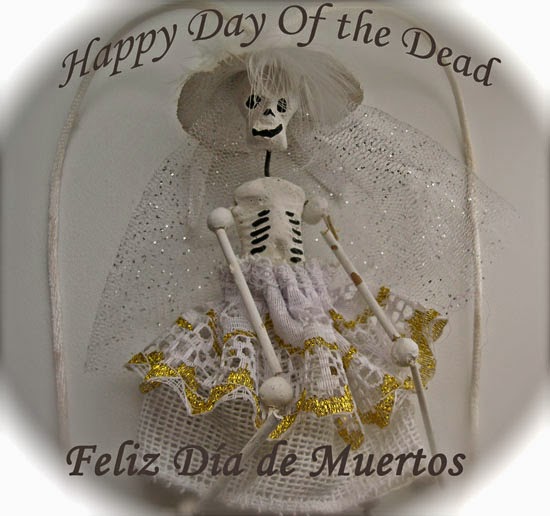
Today, We remember with happiness
the loved ones who have left us!
Happy Day Of the Dead...
"Feliz Día de Muertos"
this is a small bride skull that I got in Mexico! Isn't she cute?
______________ 0 _______________
As every 2nd of the month, Lavinia stamps has a challenge, for this month the theme is snow and glitter...
You have a whole month to enter at Lavinia's Challenge blog using at least one Lavinia stamps for the chance to win a £40.00 voucher to use at Lavinia's web store. All the DT will love to see your creations...e-mails entries are accepted as well...
And check out their NEW website, just beautiful! and NEW stamps and DIES!!!!
Good luck
here are my 2 design team (DT) projects for your inspiration!
a snowy Christmas Ornament
and a snow Winter scene using some NEW Lavinia stamps
Step by step; Snowy Christmas Ornament
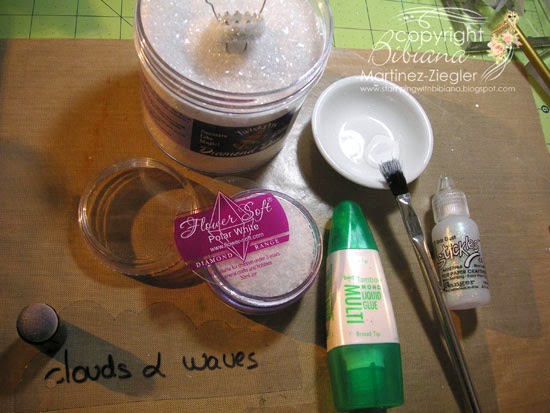
supplies...
ink "Stazon" in black, white tissue paper, decoupage medium glue and sealer "Mod Podge", "Lavinia" Fairy Stamp "Sky", "Floral Spray" and "Stars 1" , 1 ornament, some mica flakes
1- stamp on tissue paper with "Stazon" ink the "Fairy, floral and the stars" stamps on the tissue paper
2- trace shape of ornament on tissue paper , cut with scissors
3- glue this circular piece to the back of the ornament using a sponge brush with "Mod Podge", Give a light coat, let it dry
4- take off the metal piece of the ornament, add inside the ornament some "Mica flakes"
5- brush metal piece with "Tombow" glue and dip in "Diamond Dust", let it dry
insert back on the bulb/ornament.
Note: (the flower soft, the clouds template & the Stickles are some of the supplies for the next card)
6- attach strings and plastic leaves from the metal piece
glue silver string around the bulb
View from the back
Last View
Step by Step; Winter Scene Card
1- Sponge the background with the acetate template of clouds (photo below) using gray inks
2- Stamp all the images ("floral spray", "silhouette house pods" and "3 dancing fairies" with gray ink first
then all of them again with black ink (a little off set) to give a shadow effect
3- with a brush and some white acrylic paint (photo supplies above) stipple and splash the whole background (to add white spots)
4- add glue in the shape of icicles, sprinkle "Diamond Dust"
4- for the bottom add glue randomly (shape of a mount), sprinkle flower soft
5- add "Stickles"
Last View


2 really beautiful makes xx
ReplyDeleteAbsolutely gorgeous cards Bibiana. I love both of them. Hugs Rita xxx
ReplyDeleteThank you for two great tutorials. Your projects are terrific. Very beautiful indeed.
ReplyDeleteAs always, you have been so innovative.
ReplyDeletetes créations sont vraiment magnifiques bravo
ReplyDeletemerci pour le pas a pas
bisous
Beautiful ornament and card but I am sorry I don't agree on your cute verdict on the skeleton - I find them really creepy.
ReplyDeleteWow! Amazing samples as always, I love the ornament, and the icy shades on your card is gorgeous xx Zoe xx
ReplyDeleteSuperbes créations, merci pour le partage. Bises.
ReplyDeleteWow, each of these are exquisite! Big hugs, ~Diane
ReplyDeleteBeen playing catch up since being sick. Love the ornaments they are gorgeous Bibiana. I just love fairies, pretty pretty.
ReplyDeleteFirst let me tell you how much I love your bride skeleton! Looks like I have to make a trip to Mexico!!
ReplyDeleteboth of your makes are wonderful, I really love your card!
Sandy xx
preciosos me encanto la esfera :)
ReplyDeleteGorgeous and gorgeous! They are both so beautiful - I would really like to try an ornament like this - thank you for all the steps! I like how you show all the products used too! I have not heard of Lavinia stamps before - the ones you have use are very pretty!
ReplyDeleteAbsolut stunning work on both here hun. I really love the glitter feel on both, so beautiful and suitable for christmas. I really love the little ornament you made here and could suddenly think of two more ways to decorate these like this too, and even think, I have some in my hidings here somewhere he he.
ReplyDeleteThanks so much for the wonderful inspiration here today sweet friend, it´s really gorgeous.
De superbes créations Bibiana ! Superbe ce nouveau challenge Lavinia stamps ! Bises
ReplyDeletebonne chance tes creas sont sublimes, j'adore les deux
ReplyDeleteLovely frosty card I am so glad you are sharing this technique.......Lis
ReplyDeleteWhat wonderful samples, Bibiana....as always, you never cease to amaze xx
ReplyDeleteYour fairy snow projects are so pretty, love the way you used the snow and glitter in the ornament and such a pretty winter scene in the second, love your glitter framing!
ReplyDeleteJust ... WONDERFUL work, both on the samples and your tutorial on your posting.
ReplyDeleteThank you so much, Bibiana, for all your support regarding Lavinia Stamps.
Eileen xxx
very inspiring and beautiful!! :)
ReplyDeletemagnifiques toutes ces réas! bravo! bises
ReplyDelete