Hello my dear Craft and Stamper Friends:
a Guest "Blogger" Designer
for "Petaloo" at their blog
as part of their HOP
with "Coredinations" papers and "Xyron" adhesives!
Yesterday I shared with you my fall project!
Thanks a lot to all of you who came and visited me over there
and thanks to Petaloo for having me this week
here are the complete step by step of
The Double Center Step Fall card...
pin it:
I hope you liked this project...
I loved working with "Petaloo's" flowers and trims!
Thanks for the visit
and remember tomorrow
I will be at Petaloo's blog again
sharing a Halloween project,
see you then!
SUPPLIES
Yesterday I shared with you my fall project!
Thanks a lot to all of you who came and visited me over there
and thanks to Petaloo for having me this week
here are the complete step by step of
The Double Center Step Fall card...
pin it:

follow instructions on how to make the base of the shape for the double center step card
here are some of the supplies used:
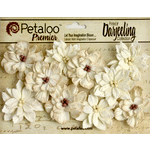
assortment of the "Petaloo" Flowers...
For the base of the card, I used "Coredinations" papers..
these papers have the particularity that when sanded they reveal a second color underneath...
in my case I first embossed the panels with a fall embossing folder, then sanded the paper and here is the result, a two tone background !
NEW: I discovered this NEW little clever tool that "Coredinations" papers carries...
It is called the "Dust Buddy", and what it is, it's a somewhat "damped"/ "sticky" dust cleaner...
It really picks up all the dust left from the sanding...
I was quite happy with it...
So if you do not know it I advise you to check it out ...it comes in handy, when you work with fine particles at your desk, such as glitter, powders or sand..
I really liked it!
no more flying/floating particles... finally!
As for "Petaloo's" flowers, I am in love!
They are incredible to work with, they add instant WOW to any project!
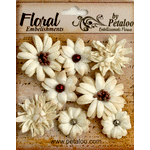
These tone on tone cream tea stained flowers are made in 100% recycled cotton, natural fibers and the flowers that come in natural color are paintable !..They are so soft to the touch and great to alter them..but I left mine in their original color!
As for the details on the flowers, see the pistils!
each flower comes with different ones...all is in the details, right?
For this particular white flower on the corner...
I used some natural burlap trim cord underneath..
I punched 2 circles, make them as stickers with the "Xyron" machine
and looped the natural cord shaping it in a flower
then placed it underneath the white flower
Some natural burlap was placed underneath the flowers and added a butterfly, die from Memory Box!
This card can be given at any occasion during fall, for thanksgiving or just to say thanks to a special someone
At the bottom I added the word "Thankful", die cut in gold mirror paper.
NEW: I discovered as well that by I inserting the die cut in the "Xyron" sticker machine to add adhesive to the back of the word, it is much easier than what I was doing before...
Until now I have being using glue to adhere these die cuts but I found out that with intricate and small words like this one, it is much easier to use this sticker machine, no more glue in my fingers or spilling around and specially with gold mirror paper that shows anything...
so from now on I will be using this little machine to adhere my die cut words...
Just insert the die cut onto the opening of the machine, pull paper, burnish it really well, peel and stick it to the project!
Added some die cut birds in green paper to join the butterflies!
and here it is a side view of the double center step fall card!
I hope you liked this project...
I loved working with "Petaloo's" flowers and trims!
Thanks for the visit
and remember tomorrow
I will be at Petaloo's blog again
sharing a Halloween project,
see you then!
closes on Nov. 4th
sponsor: Paper Crafter's Library
sponsor: Paper Crafter's Library
SUPPLIES








j adore ta carte chevalet elle est de toute beaute
ReplyDeleteun super bravo a toi merci pour le tuto trop cool
gros bizou et douce journee a toi
Extraordinary Card Bibiana. You have the best tutorials to go with the projects you create. Jim
ReplyDeleteBeautiful, thanks for the step by step too. That dust buddy looks very interesting. I love my Xyron, great for attaching ribbon to cards too! ~Diane
ReplyDeleteLove the texture and dimension on this card - really pretty result of all your work.
ReplyDeleteencore une tres belle carte bravo
ReplyDeleteta carte est superbe bravo
ReplyDeletej aime leur fleurs elles sont magnifiques
bisous
très belle ta carte bravo. bises
ReplyDeleteSuperbe carte avec de très belles fleurs. Bises.
ReplyDeletetrès très jolie carte , la gomme à poussière: connais pas mais ce doit être pratique! je n'ai pas tout compris mais je vais suivre tes étapes merci à toi bisous
ReplyDeletesuperbe carte! bises
ReplyDeleteIt's a beautiful card, Bibliana! Love this double center-step style - have not seen it before!
ReplyDeleteGorgeous! Need I say more? Thank you for the tutorial!
ReplyDeleteSandy xx
Wowza this is absolutely darling. I think I need a Xyron. You make it sound so easy.
ReplyDeleteGorgeous! There's so much to look at and those flowers are amazing. I've never seen a step card like this. Thanks so much for sharing the template with us. Hugs!
ReplyDeletebeautifully created, love the flowers and sweet shape of your card. Awesome!! :)
ReplyDeleteIt´s a really amazing and so beautiful card. I did see it yeaterday at their blog, but sure don´t mind to see it again, as it really is a beauty for sure, and whoever gets this one, is a lucky soul. It´s a real masterpiece and looks fantastic.
ReplyDeleteHave a wonderful week-end and lots of crafting fun I hope.
magnifique carte chevalet!les fleurs sont superbes, j'adore!
ReplyDeletebises
coc♥
Très belle carte que tu verras prochainement sur mon bolg, Tout est si bien expliqué! Merci pour tout!
ReplyDeleteImpossible to see all the wonderful details this card is splendid .......Lis
ReplyDeleteStunning , have loved your guest spot x
ReplyDeleteMe encanto lo pondre en practica :)
ReplyDelete